How to Delete Your Facebook Account
Permanently remove your Facebook account, main profile and the content attached to it. Review what will be lost before you continue.
Open Settings, enter Accounts Center, choose Manage accounts, open Deactivation or deletion, then select Delete account and continue.
Before you start
Deleting your Facebook account is permanent. Facebook says your main profile, additional profiles, Messenger and messages will be deleted. Download anything you want to keep and read the cancellation deadline shown during confirmation.
Follow the steps
Open Facebook settings
Tap Menu at the top left, expand Settings and privacy, then tap Settings.

Open Facebook settings. · Tap to enlarge Open Accounts Center
Tap Accounts Center near the top of Settings.

Open Accounts Center. · Tap to enlarge Manage your Facebook account
Tap Manage accounts, then tap Manage next to your Facebook account.

Manage your Facebook account. · Tap to enlarge Open Deactivation or deletion
Tap Deactivation or deletion.

Choose Deactivation or deletion. · Tap to enlarge Choose Delete account
Select Delete account, tap Continue, then read each confirmation carefully. Facebook will show the applicable cancellation deadline before the request is final.
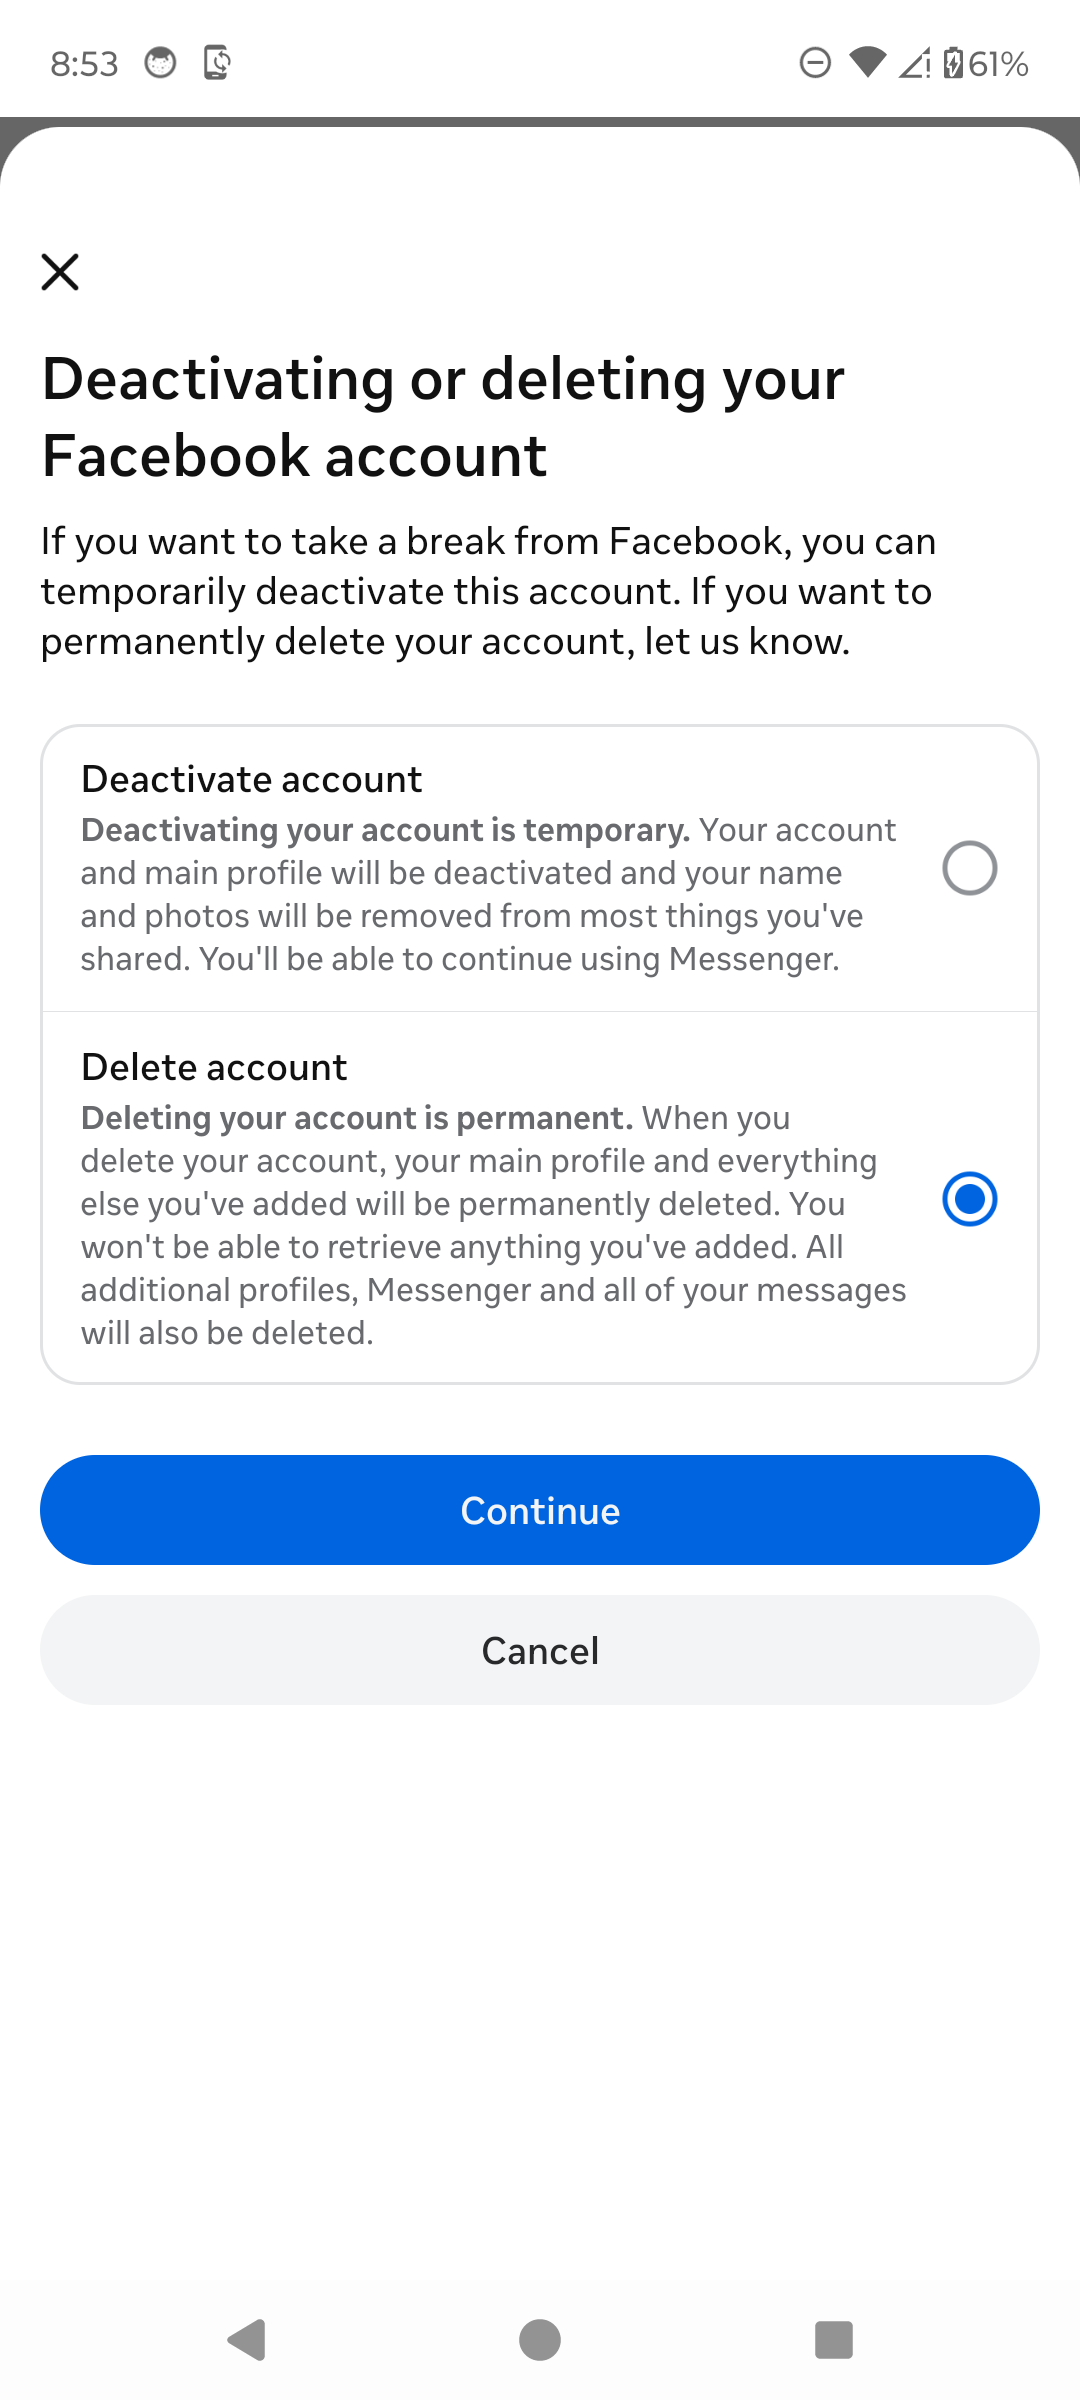
Choose Delete account, then continue. · Tap to enlarge
A couple of useful details
Is deleting Facebook permanent?
Yes. The account and its profiles are permanently removed after the applicable cancellation period.
Can I download my information first?
Yes. Request a copy of the information you want to keep before submitting the deletion request.
Can I cancel the deletion request?
Facebook shows the applicable deadline during confirmation. Log back in before that deadline and follow the option to cancel deletion.
Something not quite right?
Help us keep this guide accurate. A quick flag is enough.
Your report is sent to the Social How-To editorial team.